Organizing Tips for a Pantry:
Step One: When wanting to organize a pantry take everything out! Once you get everything out then you go through everything you just took out and see what's good and what's not. Once you throw out the bad stuff it's time to move on to step two.
Step Two: Find or go buy baskets/shelf extender and anything you need to make this project happen. A lot of people will take everything out then wonder what do with everything so that's when the baskets and portable shelf's come in handy. Once you have your baskets and etc...decide how you want everything put back.
Step Three:Put your baskets in place and then use those to store bagged items like extra bags of rice,beans,lentils,noodles and etc.
Use the portable shelf's for your canned items that way the cans take up less space! And you can also use portable shelf's for smaller jars like baby food.It kinda depends on the height of the shelving you bought. Use a lazy susan to hold peanut butter,syrup,honey,baking soda and etc. A cheap way to make a lazy susan is to buy to two round cake pans and marbles! You put the marbles between the cake pans and voila you have a lazy susan!
Step Four: If you have extra items like coffee pots, waffle makers,blenders...etc...find one area in your pantry and use that area to store those items.
Step Five: Make zones for your pantry. Example: Zone One: Baby Food and snacks. Zone Two: Baking Items.Zone Three:Canned and Jar Foods.
Zone Four: Bulk Items.
Zone Five: Canisters that hold flour,sugar,cornmeal,pancake mix and etc. Zone Six: Small appliances.
-Once you have your zones it's easier when you have to put everything back-
Step Six: Start putting everything back by zones...don't worry if it's not all the way organized yet because you can organize that when you get everything into it's zones. After you get everything into zones,choose a setup that will work for you and your family.
Example:If I have a shelf and say I have all my kid's snacks and lunch fixings on that one shelf. I have to make sure and put it where they can get to it, not way up on the top shelf. Now for the baking stuff like oil,flour,sugar,cocoa and etc...I would put that on a shelf where the little one's couldn't reach it. So basically just put stuff where you think it would be safe. For me bulk items would get put on the top shelf.
Step Seven:If you bought/have labels use them for canisters. I personally like chalk labels. You can buy them already labeled or you can buy the regular old chalk labels and use a chalk marker to write on them. *Hint* If you use a chalk marker on chalk labels ...IT WILL NOT COME OFF!! So make sure you have good handwriting before using them...Lol!
Step Eight: Do a look over and make sure you didn't miss anything and then and enjoy your pantry!!
Xoxo, Kayla

Wednesday, August 12, 2015
Wednesday, July 8, 2015
~An Organized Pantry~
Hey ya'll I know it's been awhile since I have posted a project and the reason is because I have not the time. Well our family went to San Antonio for a vacation and stayed at my Aunt Marie's house. I was showing my Aunt Lisa my blog and some of the projects I have done and my Aunt Marie was like ...''You like to organize?'' and I was like ''Yes I love to organize!!'' Well I showed her some projects that I have done and that was all it took for her to let me organize her pantry. I unfortunately didn't get to label everything because we ran put of labels and couldn't find the same exact ones...And the funny thing is right after we left my aunt text and told us she found the same labels...Lol..so everything is not labeled but some things are. I hope this inspires ya'll to go organize something! Enjoy!


 |
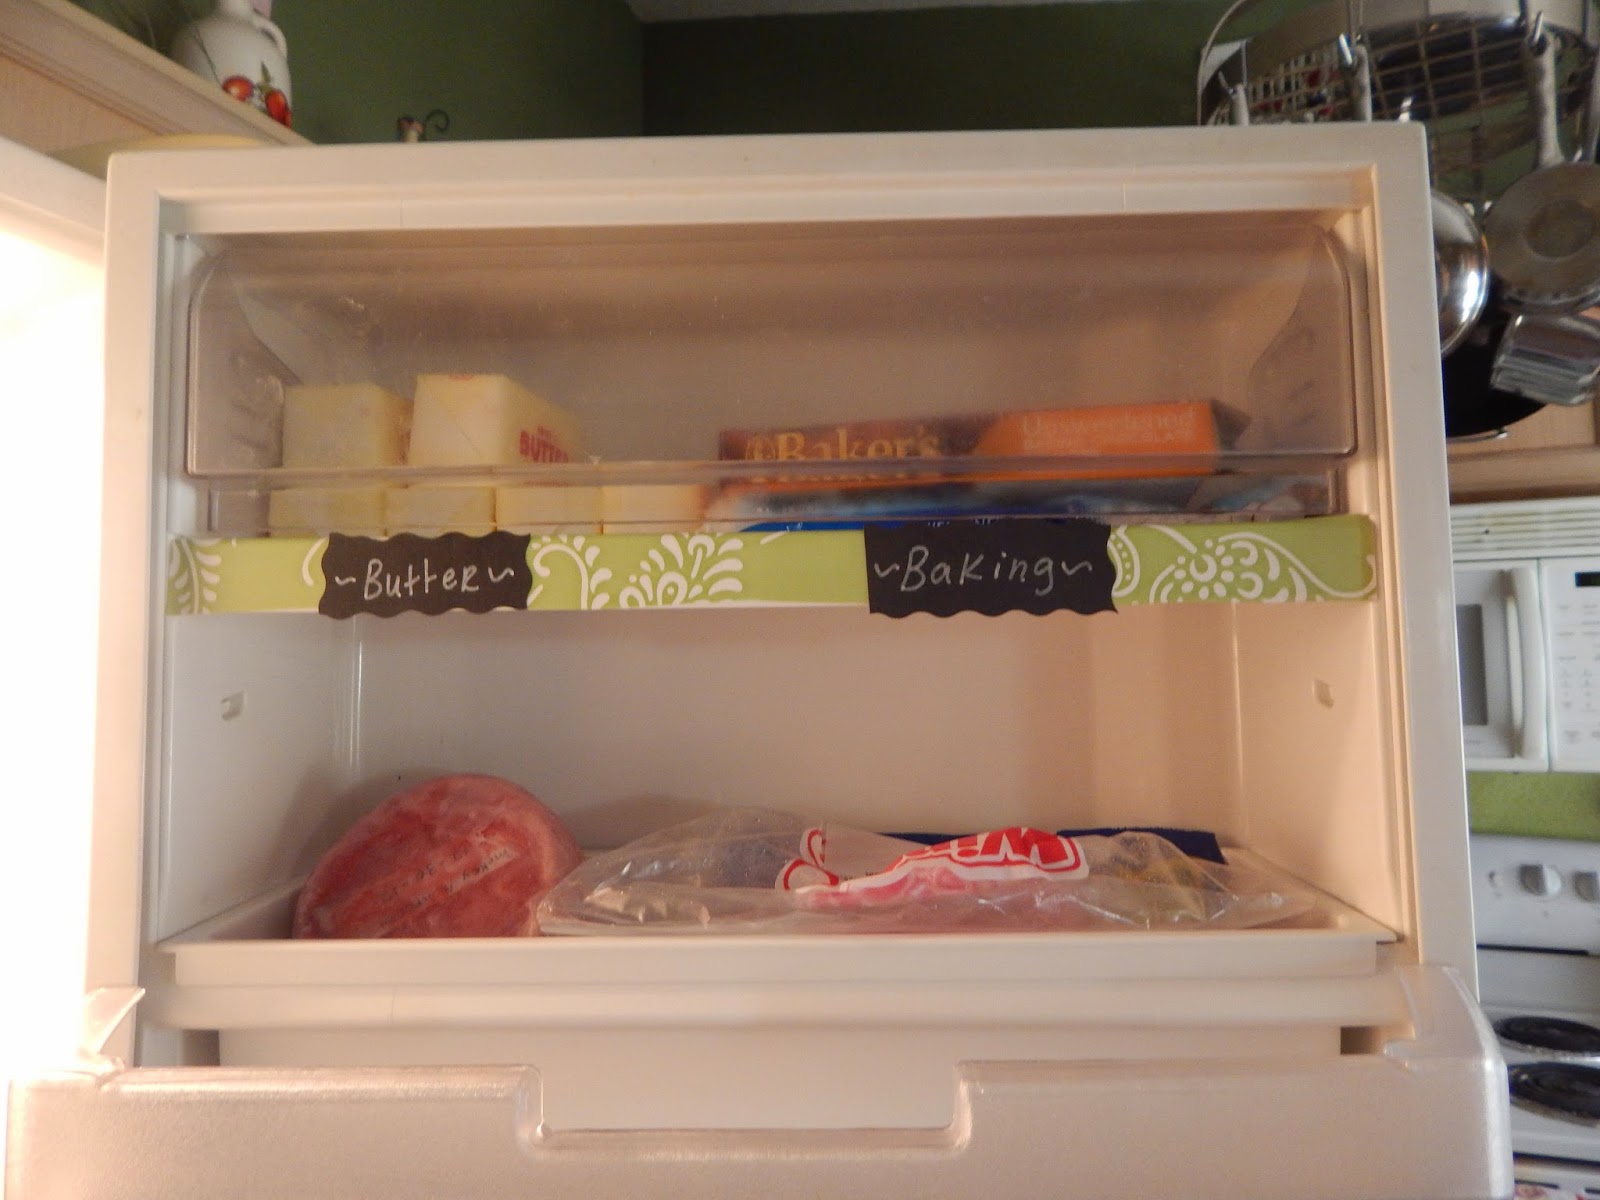
| See where I put the arrow?!.. that lil basket came in handy for the bread! |
Friday, April 10, 2015
~Classy and Fabulous~
Hey ya'll it's me again...I started looking at my
closet I decided it needed something on the wall above my shoe rack. So I
found an old picture frame that my mom had originally made a diy
chalkboard out of...(which didn't end up lasting)so I found some black
spray paint and touched up the frame.Once that was done I used contact
paper and covered the ugly looking chalkboard up..then I went on and
google and found a quote by Coco Chanel that quotes...''A Girl Should Be
Two Things...Classy and Fabulous''. Then I went on PicMonkey and
recreated the quote and designed a layout and the printed it out ...once
I did that I put the paper on the picture the got red polka dot washi
tape and made a frame for the quote! And it cost NOTHING because I
already had all the materials I needed to do it! So now I'm gonna share with ya'll the finished look!


Friday, March 20, 2015
Mouthwash Magic!


Thursday, March 19, 2015
Fridge Organizing at Grandma's House
Okay so I shared with ya'll pictures of my grandma's pantry organization ...Well I got to her fridge and I was like ''Ok this definetly needs some organizing!'' So I got to work and tackled that as well!! I used contact paper to make a base for the labels..I made the labels with black chalk paper..they are nt perfect but they worked! My grandma was so happy with her fridge! She told me she could actually find things now..Lol!!


 |
| See how everything is just stuffed...aghhh..lol |
 |
| Does it look better? |
 |
| They can alot of produce and fruit but half of it was expired |
 |
| Left Side: Snack Items Right Side:Breakfast Items |
 |
| Veggie and Fruits |
 |
| This was the door of the fridge |
 |
| This shelf was for all the weird exotic sauces..lol |
 |
| This was like all the extra stuff |
Pantry Organizing at Grandma's House
Okay so while I was vacationing in Arizona I organized my grandparents pantry and fridge ..I had opened the door to the pantry and I couldn't find a thing...so I went thru and threw useless and expired foods away and found me some jars and got to work! And grandma bought some cute chalk labels to stick on the jars...Grandma basically had every kind of jar you could imagine...Lol...She bought two extra that matched two other ones she had...This whole project cost about $15.00!!! The jars were $2.00 apiece ...which grandma found from Goodwill...the chalk labels were $3.00 and the chalk marker was about $7.00...So anyways I'm so excited to share this project with ya'll! Enjoy!!


 |
| Top Shelf |
 |
| Second shelf...Oops the contact paper came off...didn't relize |
 |
| Third shelf |
 |
| Fourth shelf |
 |
| The last shelf |
Friday, March 13, 2015
New Project!!
Hey ya'll I have a new project coming up!! Can't wait to share it with ya'll! I will post it in a week from today!!
Subscribe to:
Posts (Atom)